
How to Install a Telescoping Flagpole in Yard
A telescoping flagpole looks simple once it is standing straight and flying clean. Getting to that point is where most problems start. If you want to install telescoping flagpole in yard correctly, the real work is not raising the pole - it is choosing the right spot, setting the ground sleeve properly, and making sure the base is solid enough to handle weather year after year.
For homeowners, schools, small businesses, and property managers, telescoping poles are popular for good reason. They are easier to raise and lower than many traditional systems, they usually do not require external rope and pulley hardware, and they offer a clean appearance. But even a premium flagpole can perform poorly if the installation is rushed. A crooked sleeve, shallow footing, or poor drainage can create problems long after the concrete cures.
Before You Install Telescoping Flagpole in Yard
The first decision is location. Most buyers focus on visibility first, which makes sense, but clearance matters just as much. You want enough open space for the pole to stand without interference from trees, rooflines, utility lines, or large branches that can strike the pole in wind. If the area looks good in calm weather but nearby limbs sway over it during storms, it is not the right spot.
You should also think about how the pole will look from the street and from the home or building. In many residential yards, the best location is slightly offset from the main entry rather than directly centered in a tight planting bed. That gives the flag room to fly and keeps routine maintenance easier. For commercial properties, the right location often balances visibility with vehicle clearance, sidewalks, and underground utilities.
Call before you dig. That is not just a recommendation. It is a necessary step before any hole is opened in the yard. Water lines, irrigation, electric, gas, and communication lines may all be below grade where the perfect flagpole location seems to be.
The next point is local conditions. Soil type changes everything. A sandy yard drains well but may need more attention to footing stability. Heavy clay can hold water and create freeze-thaw stress in colder climates. In higher wind areas, proper depth and concrete work matter even more. A telescoping flagpole is easier to use than many other styles, but it still depends on a solid foundation.
What You Need for a Proper Installation
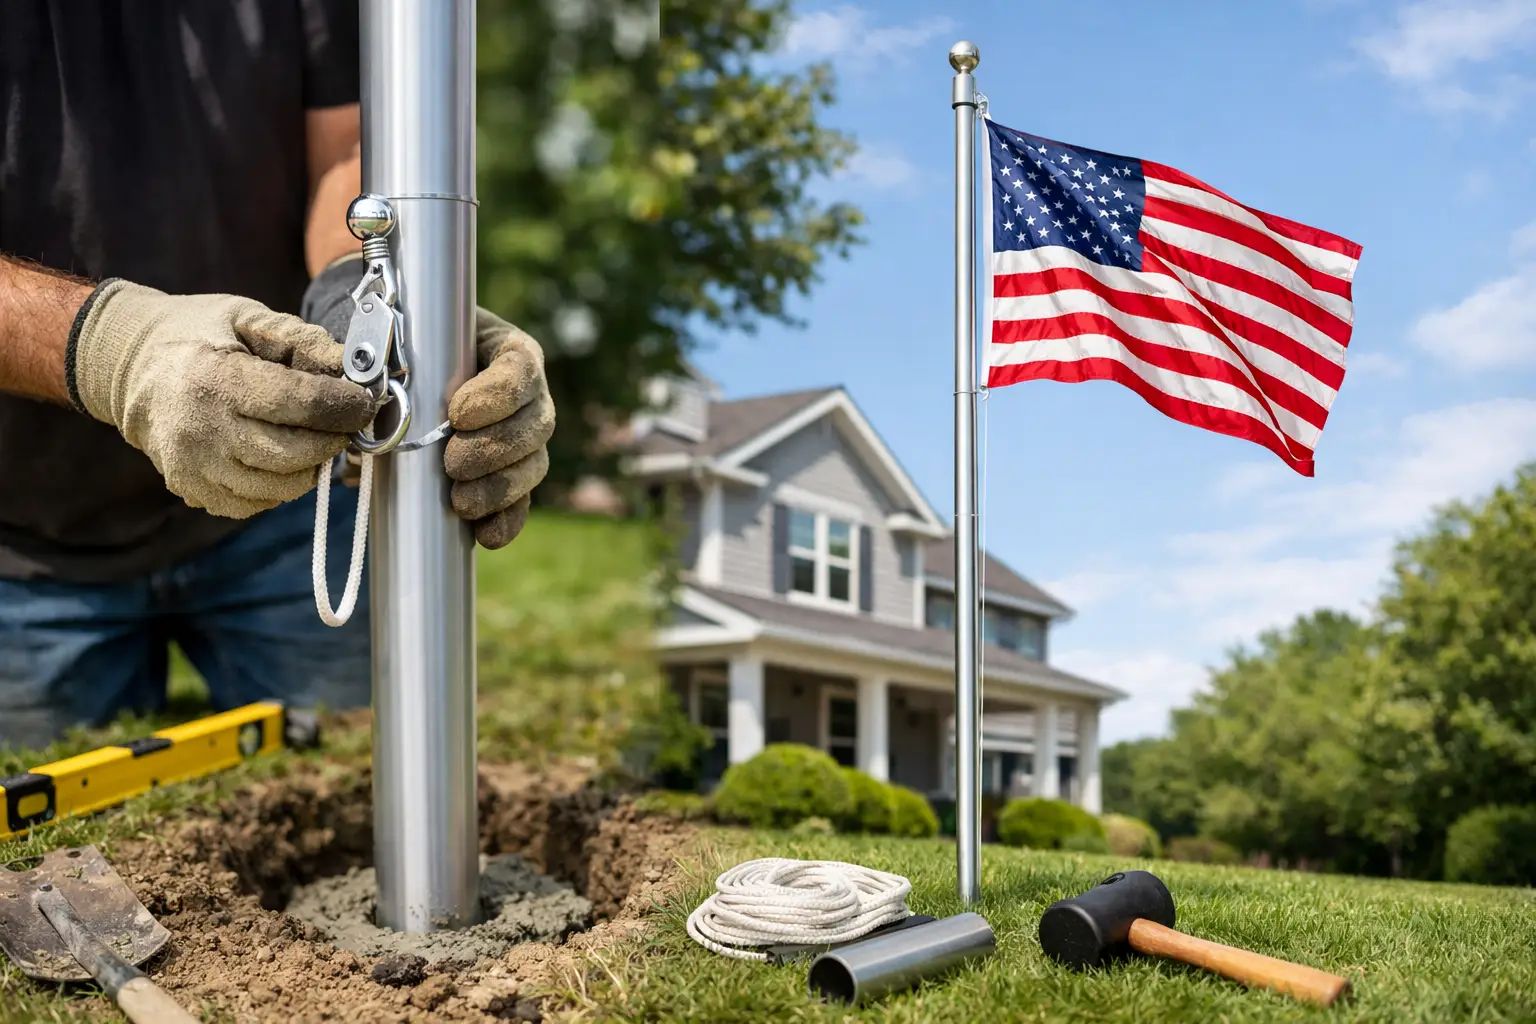
Most telescoping flagpoles are installed with a ground sleeve or anchor tube set into concrete. The exact dimensions depend on the manufacturer and pole height, so always use the product-specific instructions first. That said, the basic setup is consistent: you dig the hole, prepare the base, place the sleeve, plumb it carefully, and pour concrete around it.
You will typically need a post-hole digger or auger, shovel, gravel for drainage if required, concrete mix, a level, measuring tape, bracing material, water, and the supplied sleeve or mounting component. Some installers also keep a framing square and string line handy to verify alignment with a walkway or building face.
This is where buying from a true specialist helps. Not every telescoping pole uses the same sleeve size, footing depth, or installation details. A generic answer from a home center aisle can cost you time and concrete. Expert guidance before you start is worth more than a guess after the hole is open.
How to Install a Telescoping Flagpole in Yard Step by Step
Start by marking the exact center point of the installation. Measure twice. Then measure again from nearby hardscape, the home, or the edge of the drive so the finished location feels intentional. A flagpole becomes a focal point quickly, and even being off by a few inches can stand out once it is up.
Dig the hole according to the pole manufacturer's specs. This is not the place to improvise. Going too shallow is one of the most common mistakes, especially with residential installations. The hole needs to support the sleeve and the concrete mass around it, not just hold the pole upright for a few calm days.
If the instructions call for drainage material, add the gravel base before setting the sleeve. In many installations, that bottom layer helps water move away from the sleeve area instead of pooling around it. Some poles have very specific drainage and venting requirements, so follow those details exactly.
Place the ground sleeve in the center of the hole and check it for plumb from at least two directions. This step deserves patience. If the sleeve is even slightly out of plumb, the finished pole will show it. Use temporary braces to hold it in place while you work. Do not assume you can correct it later by forcing the pole.
Pour the concrete around the sleeve gradually while rechecking level and position. Concrete movement can shift the sleeve more than people expect. Keep verifying alignment as the hole fills. In most cases, the top of the concrete should be finished to shed water away from the opening, not create a low spot where rain can collect.
Once the concrete is in place, let it cure fully before inserting the pole. That part is hard for eager first-time owners. The pole may look ready, but premature installation can disturb the sleeve alignment or weaken the set. Follow the curing time in the instructions and adjust for weather conditions.
After curing, insert the telescoping pole according to the manufacturer's setup process. Make sure all locking collars, sections, and hardware are functioning as designed before raising it to full height. It is better to inspect operation at ground level than troubleshoot after the flag is attached.
Common Mistakes When You Install a Telescoping Flagpole in Yard
The biggest mistake is treating a telescoping pole like a decorative yard accessory instead of what it is - a structural outdoor product exposed to wind, rain, and seasonal movement. The second is underestimating placement.
Too close to a house, trees, fences, or roof overhangs, and the pole loses both function and appearance. Too shallow in the ground, and it may wobble or wear prematurely. A sleeve set out of plumb creates a problem every time you look at it.
Another common issue is ignoring wind exposure. An open rural property, corner lot, coastal site, or hilltop can place much more force on the pole than a sheltered suburban yard. That does not mean you cannot install a telescoping pole there. It means product selection and footing details need to match the site.
Drainage gets overlooked too often. Water sitting around the sleeve area can lead to corrosion, soil softening, or winter damage depending on climate. A clean installation is not just about straight lines. It is about long-term performance.
Yard Conditions That Change the Installation
Not every yard should be treated the same. If your property has soft soil, a slope, poor drainage, or strong prevailing winds, installation details may need to be adjusted within the manufacturer's approved guidelines. A level suburban lawn is one thing. A breezy commercial lot with compacted fill is another.
If you are replacing an old flagpole, do not assume the existing footing is usable. Sometimes it is easier and smarter to start fresh than to work around an outdated or incompatible base. Telescoping poles vary in diameter and design, and a mismatched sleeve can create serious fit and safety issues.
For customers in storm-prone regions, the smartest approach is usually to choose a premium telescoping pole designed for stronger conditions and install it with careful attention to the footing. The pole and the installation should work together. One cannot make up for the other.
Should You Install It Yourself or Hire Help?
That depends on the pole height, your comfort with concrete work, and the site itself. Many homeowners can handle a residential telescoping flagpole installation successfully if the yard is straightforward and the instructions are followed carefully. If you are comfortable digging, leveling, mixing concrete, and checking alignment, it can be a manageable project.
But there are cases where professional help makes sense. Rocky soil, utility conflicts, larger pole heights, commercial properties, and high-wind sites all raise the stakes. If you are spending good money on a premium American-made flagpole, it is fair to protect that investment with a proper install.
At Bob's Flagpole Company, this is exactly the kind of question customers call about before they buy. A little guidance up front can save a lot of rework later.
After Installation: Keep It Looking Right
Once the pole is in, take a few minutes every so often to inspect the sleeve area, telescoping sections, collars, and flag attachments. Dirt, lawn buildup, and neglected hardware can shorten the life of even a well-made pole. Telescoping systems are user-friendly, but they still benefit from routine care.
Watch how the flag flies in different weather. If nearby limbs start crowding the area over time, trim them back. If drainage around the base changes after landscaping, correct it before it turns into a bigger issue. A flagpole should look proud and perform reliably, not become another thing in the yard that needs excuses.
A well-installed telescoping flagpole adds more than height to a property. It adds presence. Take your time with the foundation, respect the conditions on your site, and if you need help choosing the right setup, ask before the concrete is mixed. That is usually the difference between a flagpole that simply stands and one that serves with pride for years.